
Adding CSS Code to your site.
If you get some code from a developer and are not sure where to add this, here are the two main ways. This is done using RapidWeaver 6.
Using the Page Inspector
The first way to add the code is by using the Page Inspector. When you have RapidWeaver open, look for the Inspector Icon.
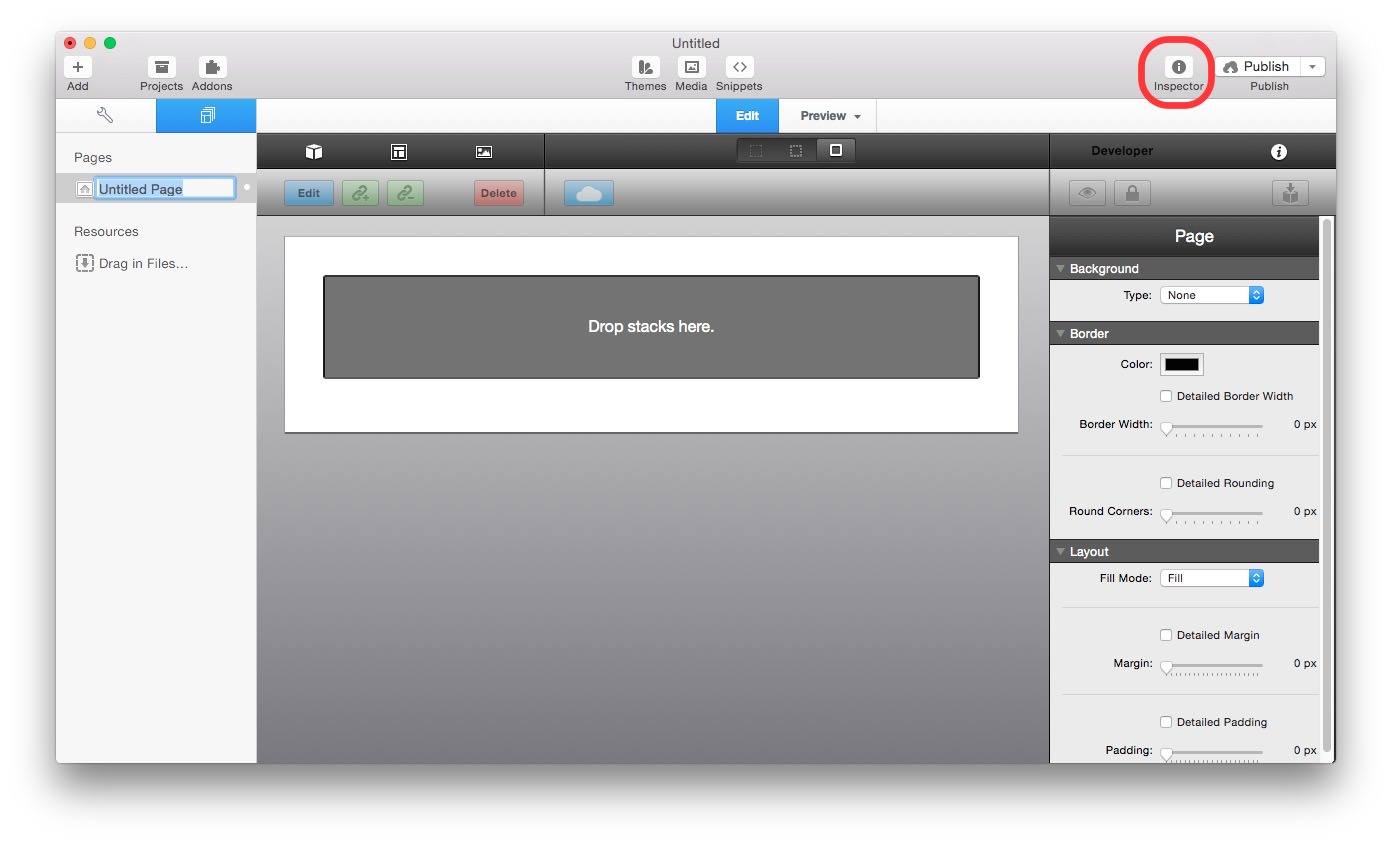
Once you click on the Inspector Icon, you will see a new panel open from the right side. The first tab you will be in is called General Settings. There are 5 different tabs above the tab name, you want to click on the third tab.

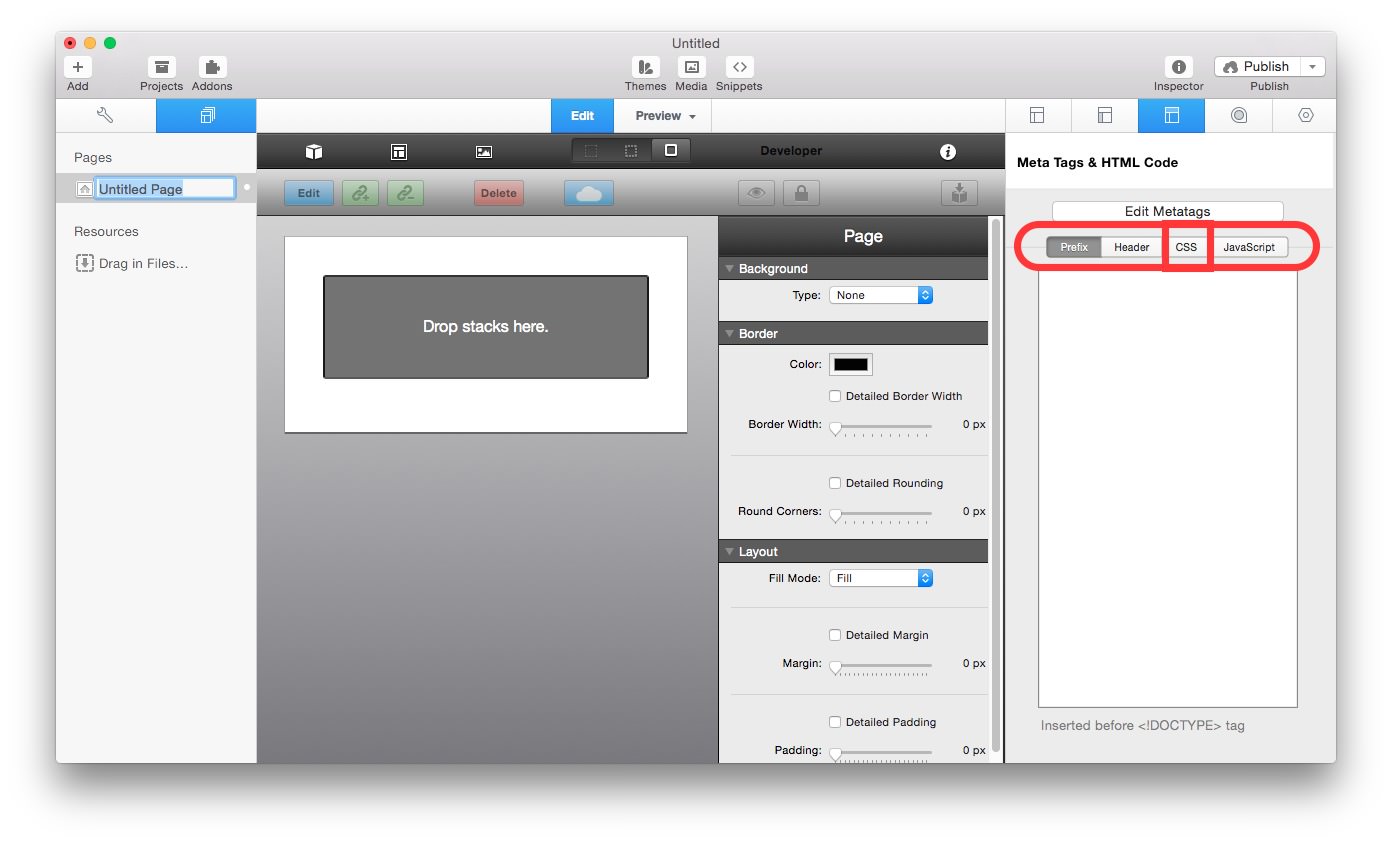
The third tab is called Meta Tages & HTML Code. When you get to this tab, there will be 4 new tabs below, Prefix, Header, CSS and JavaScript. The Prefix tab is selected by default. You want to click on the CSS Tab.
Now click on the CSS tab and enter the CSS code.
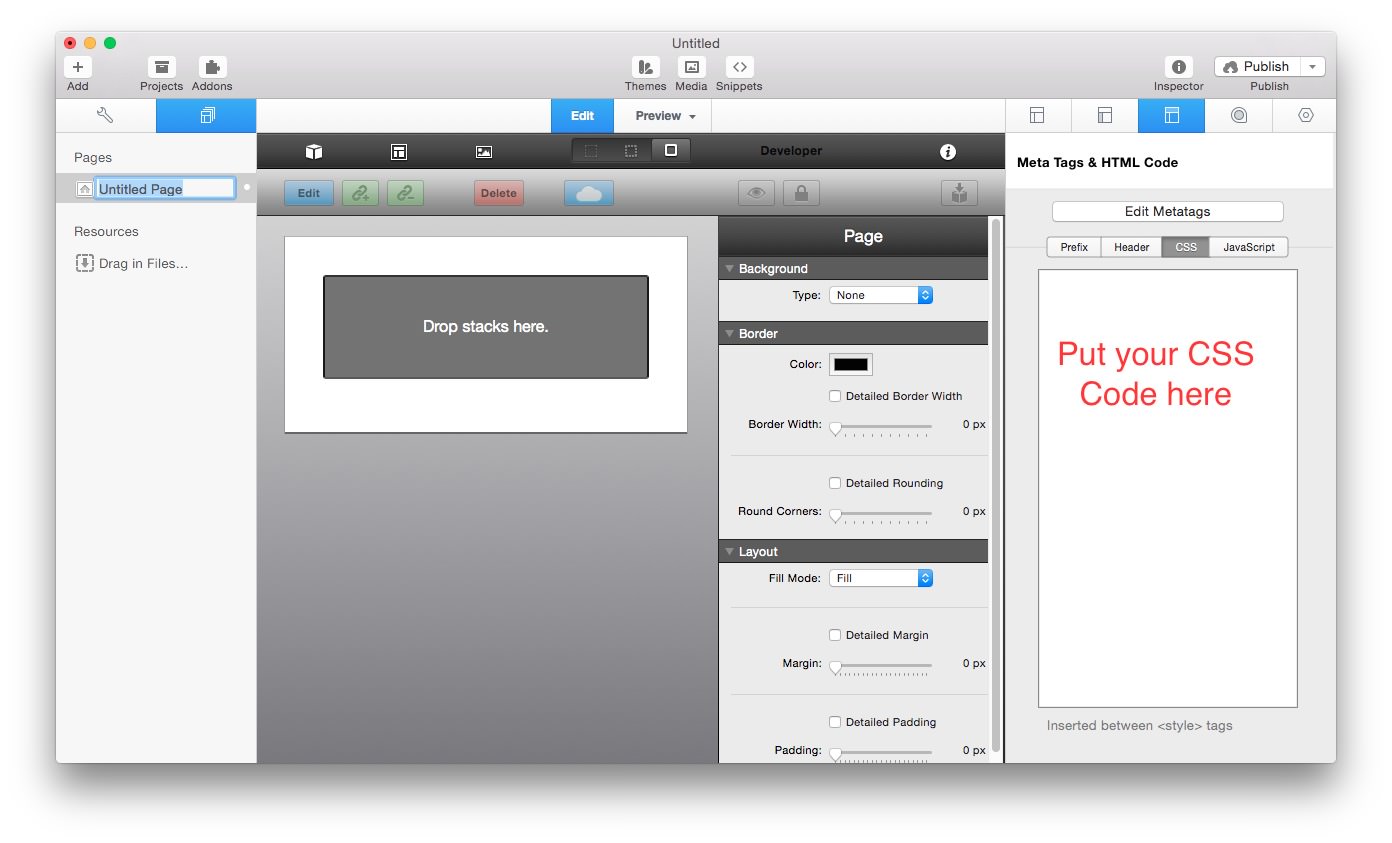
This code will work for this page only. Sometimes, you may want to put this CSS code on every page of your site. Before RapidWeaver 6, this was a tedious task of copying and pasting the code from one page to the other. Since RapidWeaver 6, there is a new area called Site Wide code.
Using Site Wide Code
Site Wide code is the second way to add CSS to your website. You only want to use the Site Wide code area if you want the CSS to be used on all pages of your website.
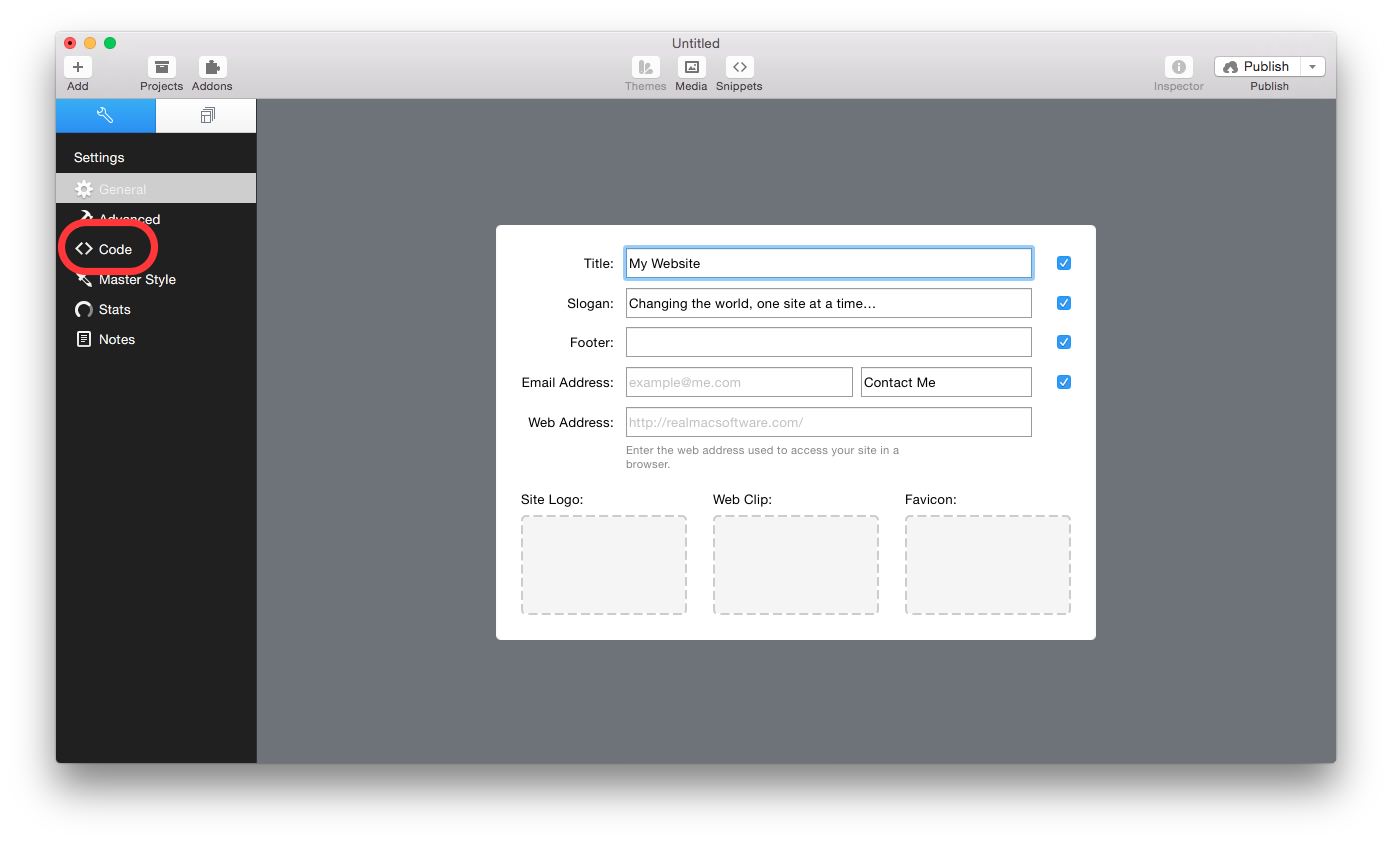
From the main RapidWeaver page you will want to click on Wrench in the upper left corner.

When you click on the Wrench, you will bring up the settings pane. By default, it goes to the General Settings, where you can set your Title, Slogan, Footer, Email Address, and Web Address. You want to find the one that is named <> Code, so click on that.
This will bring you to the Site Wide code area. There are lots of areas here to add code to your entire site. You want to find the box marked CSS and enter your code there.
Remember this will put that code on every page of your site so if this is not something you want, then user the first method mentioned above.
We hope you have enjoyed this tutorial. Now go forth and make your websites great!
Deal of the Week
Latest Updates
Latest Live Stream

{{ title }}
Latest Design
© 2024 Weavers Space | Terms of Service | Privacy Policy